
Affiliate disclosure: This guide contains affiliate links. If you purchase through these links, we may earn a commission at no additional cost to you. Thank you for your support!
Getting ready for an emergency sounds expensive until you look at what you actually need. You don’t have to buy a generator, fill a garage with supplies, or order a giant survival kit. You can start with things you already own, cover a few important gaps, and build from there.
This guide walks you through a practical way to prepare for three days without normal services, then gradually work toward a week or two at home. If you’ve never put together emergency supplies before, start here.
What does emergency preparedness actually mean?
It means being able to handle a disruption without immediately needing to find a store, working outlet, or outside help. Think about a power outage, a water main break, a severe storm, or a road closure that makes it hard to get supplies.
For most households, the first goal isn’t surviving in the wilderness. It’s getting through an ordinary emergency at home, safely and with less stress. You also need a separate plan for emergencies that make it unsafe to stay home.
A sensible starting target: three days of water, food, light, basic medical supplies, hygiene items, and a way to get information. After that, build toward seven days, then fourteen. The American Red Cross recommends a two-week supply of food and water for home and a portable three-day supply for evacuation.
Step 1: Think about the emergencies most likely where you live
Before spending any money, write down the situations your household is most likely to face. A family in a hot climate might worry about losing air conditioning. Someone in a cold area might need a backup plan for staying warm. Other common problems include severe storms, flooding, wildfire smoke, temporary water outages, and evacuation.
Ask yourself:
- What would we do if the power went out tonight?
- Could we drink, eat, and wash our hands if the tap stopped working?
- Would we know where to go if we had to leave quickly?
- Does anyone depend on refrigerated medicine, powered medical equipment, or another essential service?
- What would our children, older relatives, or pets need?
You don’t have to solve every scenario today. This exercise helps you buy what matters to your household instead of copying somebody else’s shopping list.
Step 2: Check what you already have
Take ten minutes and look around your house. You may already have several days of pantry food, a working flashlight, spare blankets, a manual can opener, and basic first aid supplies. Put them on a list before buying duplicates.
Check that things actually work. A flashlight with dead batteries isn’t much help. Neither is a phone charger that only works with an outlet when the power is down.
Keep everyday items in their normal places if that’s convenient, but make sure everyone knows where they are. A small labeled bin for items you rarely use can help.
Step 3: Store enough drinking water
Start with at least one gallon of water per person per day. That’s the CDC’s basic emergency planning amount for drinking, cooking, brushing teeth, and some other needs. Store at least three days’ worth, and work toward two weeks if you have the space. You may need more for hot weather, illness, pregnancy, or pets.
| People | 3 days | 7 days | 14 days |
|---|---|---|---|
| 1 | 3 gallons | 7 gallons | 14 gallons |
| 2 | 6 gallons | 14 gallons | 28 gallons |
| 4 | 12 gallons | 28 gallons | 56 gallons |
These are minimum planning amounts, not a promise they’ll cover every household use. Pets and extra sanitation needs add to the total.
Budget approach: Begin with commercially bottled water or appropriately cleaned, food-grade containers intended for drinking water. Don’t reuse containers that previously held chemicals. Keep water somewhere cool and away from direct sunlight. Follow the container or bottled-water label for storage. If you fill your own containers, the CDC recommends replacing the stored water every six months.
If you’ve only got room for three days, store three days. That’s still a meaningful improvement over having none.
Step 4: Build an emergency pantry from food you actually eat
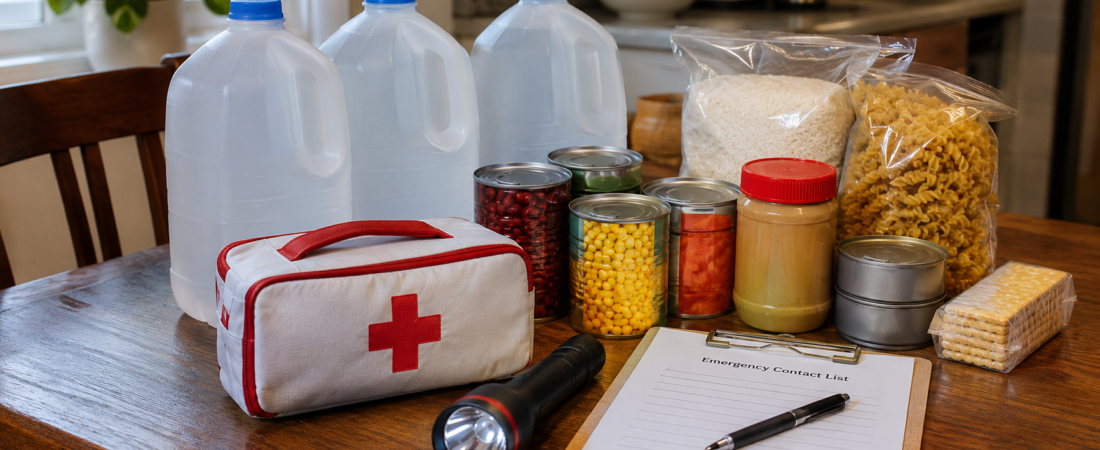
You don’t need freeze-dried meals or a special bucket. Start with food that keeps well and needs little or no preparation. Good candidates include canned beans, canned fish or chicken, peanut butter, crackers, shelf-stable milk, fruit cups, oatmeal, and other foods your household already likes.
For your first three days, plan complete meals and snacks for each person. Think about calories and dietary needs, not just the number of cans on a shelf. Include a manual can opener if you’re storing cans that need one.
Choose some food you can eat without a stove, electricity, or refrigeration. Rice and dried beans are affordable pantry staples, but they require water, fuel, and cooking time. They make more sense as part of a bigger supply once you have a safe cooking plan.
As your budget allows, buy an extra item or two during normal grocery trips. Use older food first and replace it with new purchases. That way, your emergency pantry stays useful instead of becoming a box of forgotten food.
Step 5: Plan for light, phone charging, and information
Power outages are easier to manage when you can see what you’re doing, charge a phone, and hear local updates.
- Light: Start with at least one working flashlight and spare batteries. An LED lantern makes it easier to light a room without holding a flashlight.
- Charging: Keep a phone power bank charged, along with the right cable. Check it every few months.
- Updates: A battery-powered or hand-crank radio can help when home internet or cell service isn’t reliable. A NOAA Weather Radio is useful for weather alerts in areas it serves.
Skip the generator at first unless someone in your household has a specific power need that makes it essential. For many beginners, lighting and a charged phone are the first problems worth solving.
Safety: Never run a fuel-powered generator, charcoal grill, or camp stove inside a home, garage, or other enclosed space. They can produce deadly carbon monoxide. Have working carbon monoxide alarms and follow the manufacturer’s instructions for any equipment you use.
Step 6: Cover medical needs and basic hygiene
Look through your medicine cabinet. Do you have bandages, sterile gauze, medical tape, disposable gloves, a thermometer, and the medications your household depends on? A basic first aid kit is useful, but knowing how to use it matters more than how impressive the case looks.
Make a written list of important medications, dosages, allergies, and relevant medical contacts. Ask your pharmacist or healthcare professional about maintaining an appropriate emergency supply of prescriptions, especially medications that need refrigeration or special handling. Don’t change doses or stockpile medicine unsafely.
For hygiene, set aside toilet paper, soap, trash bags, hand sanitizer, menstrual supplies if needed, diapers if needed, and basic cleaning supplies. A water outage can quickly turn hygiene into a bigger problem than people expect.
Step 7: Make a family plan before you need it
This part costs nothing and could be more useful than another piece of gear.
- Choose a nearby meeting spot in case you need to leave your house, plus a second location outside your neighborhood.
- Pick an out-of-area contact everyone can check in with if local communication is disrupted.
- Write important phone numbers on paper, not just in your phone.
- Know the local hazards, evacuation routes, and where to find official emergency alerts.
- Keep copies of important documents in a secure, easy-to-grab place, and protect sensitive information.
- Talk through the plan with everyone in your household and practice it.
If an emergency makes your home unsafe or officials tell you to evacuate, leave. A stocked pantry is not a reason to ignore evacuation instructions.
Step 8: Put together a small grab-and-go kit
Your home supplies and your evacuation supplies solve different problems. You might store two weeks of water at home, but you probably can’t carry it out the door.
Use a backpack or sturdy bag you already have. Add a compact flashlight, water, ready-to-eat food, necessary medications and supplies, a phone charging cable, basic hygiene items, a copy of your contact plan, and appropriate clothing. Include essentials for children and pets. Keep it somewhere you can find quickly.
Don’t worry about making it look like a survival kit on social media. The point is to have the important things together when you’re in a hurry.
What should you buy first?
If money is tight, use this order as a starting point. Skip items you already have, and move anything tied to an urgent medical or climate risk to the top.
| Priority | General product or supply | What to look for |
|---|---|---|
| 1 | Drinking water or food-grade water containers | Safe drinking-water storage with enough capacity for your household |
| 2 | Ready-to-eat shelf-stable groceries | Foods you already eat; some that need no cooking |
| 3 | LED flashlight and spare batteries | Simple controls, common battery size, dependable operation |
| 4 | Basic first aid supplies | Practical contents rather than a large advertised piece count |
| 5 | Phone power bank and cable | Compatible with your phone; rechargeable and easy to check |
| 6 | Hygiene supplies and sturdy trash bags | Enough for the household; appropriate for individual needs |
| 7 | Battery-powered or hand-crank NOAA weather radio | Receives local alerts; batteries or charging method you can maintain |
| 8 | Manual can opener | Comfortable, reliable, and only needed if your stored cans require one |
Buying note: These are product categories, not endorsements of particular brands. Compare what you already own with what you still need before shopping.
A simple four-week starter plan
You can make progress even if you can only set aside a little money each week. Here is one way to spread out the work:
Week 1: Make the plan and start with water
Write down your emergency contacts, identify likely local risks, check your supplies, and put aside the first portion of your drinking water.
Week 2: Fill in three days of food
Plan three days of simple meals using shelf-stable groceries. Buy only what you’re missing. Check for a manual can opener.
Week 3: Prepare for a blackout
Test your flashlights, find batteries, charge your power bank, and figure out how you’ll receive local news and alerts. Make a plan for safe temperatures if the power is out.
Week 4: Cover health, hygiene, and evacuation
Check first aid supplies and prescriptions, gather hygiene basics, and pack your grab-and-go bag. Review the household plan together.
At the end of the month, take another look at your supplies. You might have three full days covered or you might still have a few gaps. Either way, you now know exactly what to work on next.
From three days to two weeks: what changes?
Once your three-day setup is in place, don’t start over with a more expensive kit. Add more of the basics you already use.
- For seven days: Increase stored water and no-cook food, think through sanitation, and check whether your lighting and charging setup can last the week.
- For fourteen days: Work toward a two-week home supply of water and food, a realistic plan for medical needs, and safe ways to manage extended utility outages. Be honest about storage space and your home’s temperature risks.
- For either goal: Rotate supplies, test equipment, review medication needs, and update the plan as your household changes.
It’s also worth remembering that some emergencies require leaving rather than staying. Keep evacuation supplies portable and know when to use them.
Common beginner mistakes
- Buying gadgets before water and food. A fancy tool won’t help much if your household has nothing to drink.
- Stocking food nobody eats. It costs more in the long run when it expires untouched.
- Depending on food that needs cooking. Include some meals that work even if you can’t use a stove.
- Forgetting individual needs. Medication, baby supplies, mobility aids, and pet supplies aren’t optional for people who depend on them.
- Storing everything and never checking it. Batteries die, food ages, and plans go out of date.
- Assuming staying home is always safest. Follow official evacuation and shelter instructions for the actual emergency.
Beginner emergency preparedness checklist
Use this as a quick inventory. You can copy it into a note or print the page.
- ☐ I know the most likely emergencies in my area.
- ☐ Everyone in my household knows our contact and meeting plan.
- ☐ We have at least three days of drinking water, with extra for pets and special needs.
- ☐ We have at least three days of food, including food that doesn’t need cooking.
- ☐ We have a manual can opener if our food requires it.
- ☐ We have working flashlights and batteries.
- ☐ We have a way to charge a phone and receive emergency information.
- ☐ We have first aid supplies and a plan for essential medications.
- ☐ We have hygiene supplies and trash bags.
- ☐ We have a small bag ready if we need to leave quickly.
- ☐ We know how to get official local alerts and when to evacuate.
- ☐ We’ve made a plan to gradually extend supplies to seven and fourteen days.
Frequently asked questions
How much does it cost to start emergency preparedness?
It depends on how many people you’re preparing for and what you already own. Start by taking inventory and handling free tasks, such as writing a contact plan. Then buy missing essentials in small amounts during normal shopping trips. There’s no universal price you must spend to be prepared.
Do I need a 72-hour emergency kit?
Three days is a useful first target, especially for supplies you may need to carry during an evacuation. For staying at home, the American Red Cross recommends working toward two weeks of food and water. You can assemble supplies yourself rather than buying a premade kit.
Should I buy a generator?
Not necessarily. Many households should handle drinking water, food, lighting, communication, and medical needs first. If you depend on powered medical equipment or face dangerous indoor temperatures during outages, make a specific backup plan rather than relying on a generic shopping list.
Where should I keep emergency supplies?
Choose a place you can get to easily, protected from heat, sunlight, moisture, and anything that could contaminate food or water. Keep a small evacuation bag where you can grab it fast. Everyone in the household should know the locations.
Start small, then keep going
You don’t need to finish all of this over one weekend. Fill a few water containers, set aside meals your family will actually eat, check your flashlights, and write down your emergency contacts. Those small jobs count.
Once your first three days are covered, add a little more as you can. A useful emergency plan is one you can afford, maintain, and actually follow.